Cabinet Hardware Trends: Scale, Mixed Finishes & Going Handleless
How to size pulls and knobs, mix metals without chaos, and decide whether handleless kitchen cabinets suit a pre-war NYC kitchen. Real numbers included.
· the kitchen guy
hardware is the smallest line item on a kitchen budget and the thing people touch hundreds of times a day. it is also the decision most often left to the last week, when the cabinets are already built and the options have narrowed.
here is how we think about it: scale first, finish second, and handleless only when the kitchen can carry it.
what's actually trending in cabinet hardware
the loudest cabinet hardware trends right now are about restraint and tactility. longer, slimmer pulls. knurled and ribbed textures. living finishes like unlacquered brass that darken with use. and a steady shift away from matching every piece to a single metal.
what has faded: oversized cup pulls on every drawer, shiny polished chrome across the whole room, and the instinct to buy one pull in one size and repeat it forty times.
what hasn't changed is that hardware should suit the door. a flat slab and a beaded inset door ask for different things, and no trend overrides that.
scale: the mistake we see most
undersized hardware is the most common error. a 3-inch pull on a 36-inch drawer looks like an afterthought, and it's awkward to grip with wet hands.
working ranges we use as starting points:
- drawers 15–24 inches wide: 5 to 8-inch pulls (center-to-center of 3¾ to 6¼ inches works well).
- drawers 27–36 inches wide: 8 to 12-inch pulls. a good rule is roughly one-third of the drawer width.
- doors: knobs from 1¼ to 1½ inches, or pulls of 5 to 8 inches mounted vertically.
- appliance pulls: 18 to 24 inches on a paneled refrigerator or dishwasher, ideally matched to the panel height.
placement matters as much as size. on base doors, mount the pull or knob 2½ to 3 inches down from the top corner, opposite the hinge. on upper doors, mount 2½ to 3 inches up from the bottom. on drawers, center the pull vertically on the front, or run it along the top rail on deep pot drawers.
then check projection. most pulls stand 1 to 1½ inches off the face. in a pre-war galley with a 36 to 42-inch aisle, that adds up. a pull that catches a hip or a pocket on every pass will annoy you within a week. in tight aisles, favor low-profile bar pulls or edge pulls.
mixing finishes without making a mess
mixing metals works when it looks decided. our guardrails:
- limit yourself to two metals, plus one accent at most. more than that and the room reads as a showroom board.
- assign roles. for example, knobs on uppers and doors in one finish, pulls on drawers in another. or all cabinet hardware in one finish, with the faucet and lighting in a second.
- repeat each finish at least twice in different places. one lone brass pull on a dark kitchen looks like a mistake. brass on the pulls and again on a pendant looks like a plan.
- match undertones to the wood or paint. warm, honey-toned oak such as White Oak Caramel sits well with aged brass and bronze. cooler painted cabinets can take nickel or blackened steel.
one caution on living finishes: unlacquered brass will patina unevenly, and the spots near the stove darken faster. if you want it to stay as delivered, specify a lacquered or PVD-coated version. if you want a worn-in look, ask for a sample and carry it in your pocket for a month.
matching hardware to the door
a slab door like Canal has nothing to hide behind, so the hardware is the whole decoration. choose it deliberately, and keep it slim and linear.
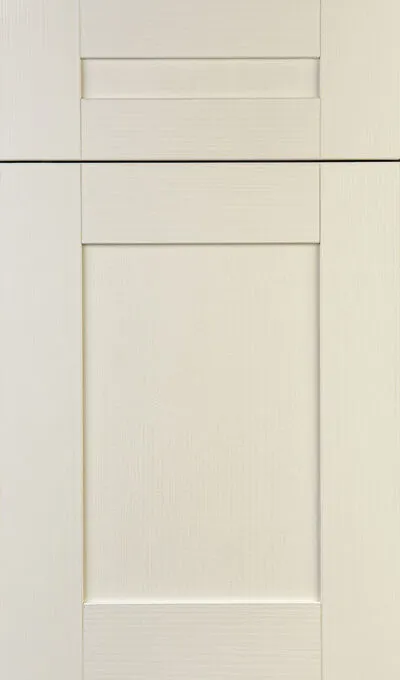
a shaker profile such as Lispenard Frame is more forgiving. it takes a knob on doors and a bar pull on drawers without fuss, and it works in either a traditional or a modern room.
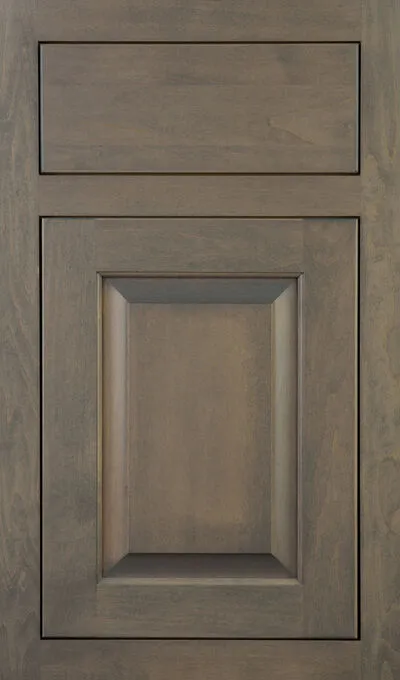
detailed doors, like the beaded Henry Street, have enough going on that the hardware should support rather than compete. think a slightly smaller knob, a cup pull on drawers, and a quiet finish. in a brownstone parlor-floor kitchen with original millwork nearby, this is usually the right call.
handleless kitchen cabinets: what you gain and what you give up
handleless kitchen cabinets are appealing for good reasons. the fronts read as a single clean plane. there is nothing to snag in a narrow aisle. and in a small apartment, with 8 to 10 feet of cabinetry, removing visual clutter makes the room feel larger.
the trade-offs are real, though, and worth weighing before you commit:
- construction. true handleless usually means a routed finger grip, an integrated channel, or a continuous rail profile. these work best on frameless boxes with overlay doors. a traditional inset door sits within a frame with a small reveal, so a handleless look there is more limited and relies on a routed edge grip rather than a full channel.
- cost. expect the channel profiles and extra machining to add roughly 5 to 12 percent to the cabinet cost, depending on run length and finish. conventional hardware for a full kitchen typically runs $1,200 to $5,000, so the savings on hardware rarely offset the premium.
- ergonomics. a finger channel at the top of a base cabinet needs about 1¼ to 1½ inches of clearance under the countertop edge. heavy drawers, such as 30-inch pot drawers, are less comfortable to open without a real handle.
- maintenance. grip edges collect fingerprints and grease, especially on matte dark finishes or high-gloss lacquer. plan on wiping them down regularly.
- push-to-open. it suits light uppers and small drawers. we steer clients away from it on heavy pantry doors and on any door that will see a lot of use, because the mechanisms are the first thing to fail and are awkward to repair behind a finished panel.
a hybrid is often the best answer. go handleless on tall pantry runs and uppers, where the cabinets are most visible, and add slim pulls to the working drawers by the range. it keeps the calm and puts a handle where your hand wants one.
practical notes for NYC projects
if you are renovating a pre-war co-op on the Upper West Side or a similar building, remember that everything has to come up in a service elevator on a schedule. that is one more reason to finalize hardware early, so pulls arrive with the cabinets and not weeks after.
- lead times: stock hardware usually arrives in 1 to 3 weeks, but custom finishes and special lengths can take 4 to 8 weeks. order before installation, not after.
- order spares. keep 5 to 10 percent extra, because a discontinued finish is difficult to match later.
- drill templates. if you plan to change hardware later, keep the same center-to-center spacing so you don't have to fill and refinish door fronts.
- mock it up. tape paper cutouts to your existing cabinets, or hold physical samples, and live with them for a few days before you sign off.
see it in person
hardware is easiest to judge in your hand and against real door samples. visit our Manhattan, Cedarhurst or Hollywood, FL showroom, or get in touch to book a time. bring your floor plan, your photos and your questions about scale, finish and whether handleless is right for your kitchen.
mentioned in this note

keep reading
Loft Kitchen Design Around Cast-Iron Columns
Cast-iron columns are the best thing in a loft kitchen. Wrap them in an island or hide them in a run, and here is how the cabinetry has to be built.
Base Cabinet Drawers vs. Doors: Why We Spec Drawers
Drawers beat doors in nearly every base cabinet. Here is how we spec them for tight NYC kitchens: widths, depths, load ratings, and the few places doors still win.
Kosher Kitchen Design: Two of Everything, Done Elegantly
A kosher kitchen layout doubles sinks, dishwashers and storage. Here is how to plan the cabinetry so it reads as one calm room, even in a tight New York footprint.